Create Scenes
When you create a project, it contains an initial Scene (MyScene.wescene) that includes some base entities.
In Evergine scenes are created similarly to other assets.
Create a Scene Using Evergine Studio
There are two ways to create a Scene in Evergine Studio:
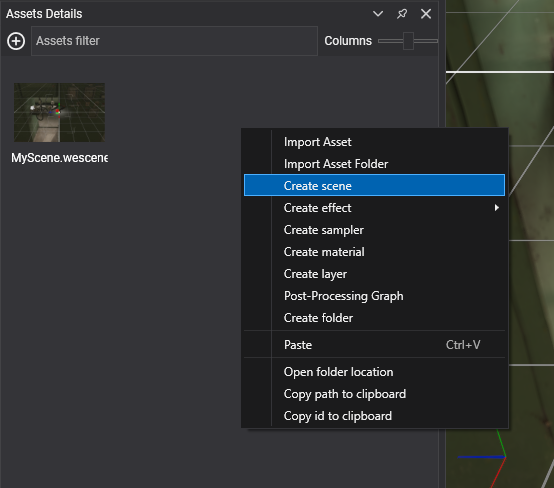
- In the Assets Details panel, right-click and select the Create scene menu item.

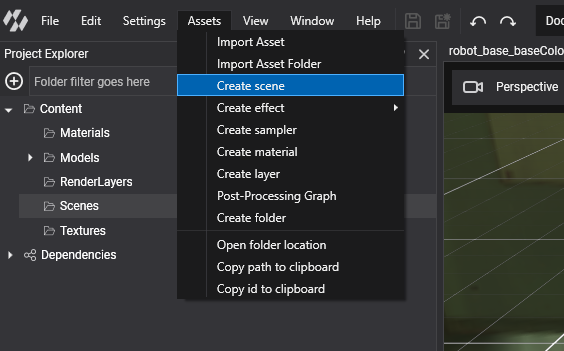
- Alternatively, in the main menu, select Assets > Create scene.

Note
When you create a Scene, the new asset will be placed in the currently selected Asset Folder, which is shown in the Project Explorer panel and the Assets Details panel.
Create a Scene by Code
To generate a new Scene using code, simply create a new class that extends the Scene class:
- Create a new class in your Evergine project (e.g.,
MyScene.cs). - Make that class inherit from the Scene class.
- You can override the following important methods:
| Method | Description |
|---|---|
| CreateScene() | Method where all the scene entities are created and added to the Scene. |
| RegisterManagers() | Method where the SceneManagers are loaded. base.RegisterManagers() will register the default SceneManagers. |
| Start() | Called just before the Scene starts updating and drawing. |
| End() | Ends the Scene. |
| Pause() | Called when the Scene is paused. This can occur if the app is suspended or if it is manually paused through the ScreenContextManager. |
| Resume() | Resumes the Scene when it is paused. |
Here is a code example:
public class MyScene : Scene
{
    public override void RegisterManagers()
    {
        base.RegisterManagers();
        this.Managers.AddManager(new Evergine.Bullet.BulletPhysicManager3D());
    }

    protected override void CreateScene()
    {
        // Add scene entities.

        // Create a camera
        var cameraEntity = new Entity("camera")
            .AddComponent(new Transform3D())
            .AddComponent(new Camera3D())
            .AddComponent(new FreeCamera3D());

        this.Managers.EntityManager.Add(cameraEntity);
    }
}