Create a New Project
To create a new project from the Evergine Launcher, go to the My Projects section and click on the Add New Project button.

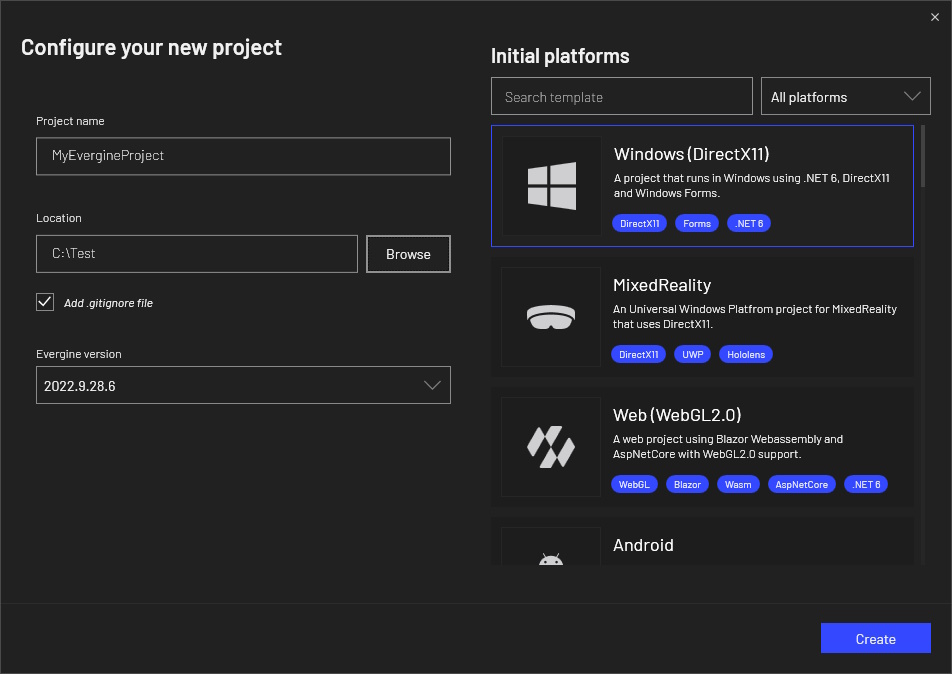
The project configuration window will open. Here, you can choose the Project Name, the disk location of your project, and the Evergine version to use. Additionally, you can choose a single or multiple profiles for your project.
Tip
New profiles can be added later.
As the number of templates has grown in the latest Evergine releases, we have decided to add some filters that may be useful for finding the desired template. You have a free text input and a platform dropdown selector that you can combine to limit template results.

Open Your New Evergine Project
Finally, click on the Create button in the bottom right corner of the configuration panel to create and open your project in Evergine Studio.

Next Steps
Learn how to open your Evergine project in Visual Studio