Using Postprocessing Graph

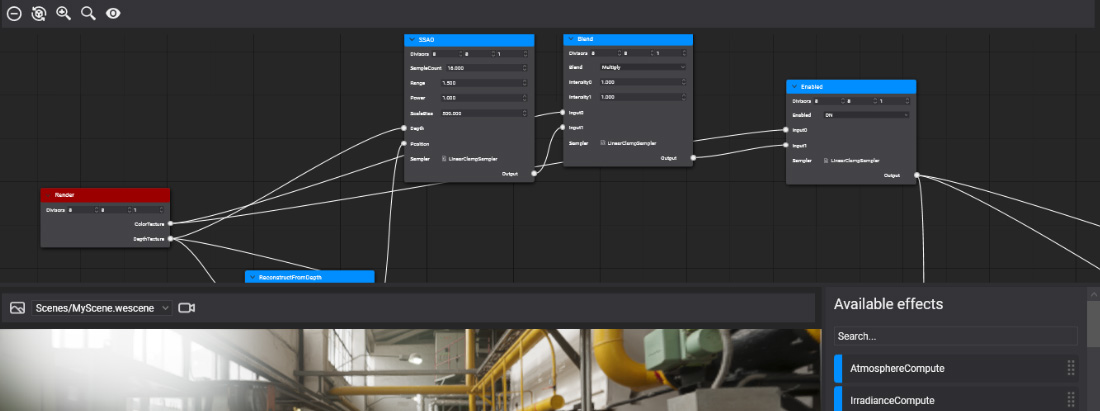
In this document, you will learn how to load and use the Postprocessing Graph in your applications.
Load Postprocessing Graph from Code
The following sample code can be used to instantiate an existing postprocessing graph asset and apply it in your scene.
protected override void CreateScene()
{
    var assetsService = Application.Current.Container.Resolve<AssetsService>();

    var graph = assetsService.Load<PostProcessingGraph>(EvergineContent.PostprocessingGraph.MyPostProcessingGraph);

    // Add postprocessing graph to the scene
    Entity postprocessingVolume = new Entity()
        .AddComponent(new Transform3D())
        .AddComponent(new PostProcessingGraphRenderer() { ppGraph = graph });

    this.Managers.EntityManager.Add(postprocessingVolume);
}
How to Apply Postprocessing Graph to a Scene from Evergine Studio
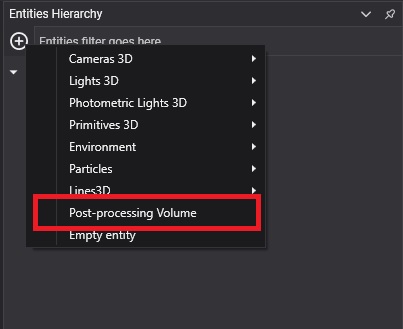
You can apply a postprocessing graph to your scene by clicking on the ![]() button from the Entities Hierarchy panel and selecting Post-processing Volume.
button from the Entities Hierarchy panel and selecting Post-processing Volume.

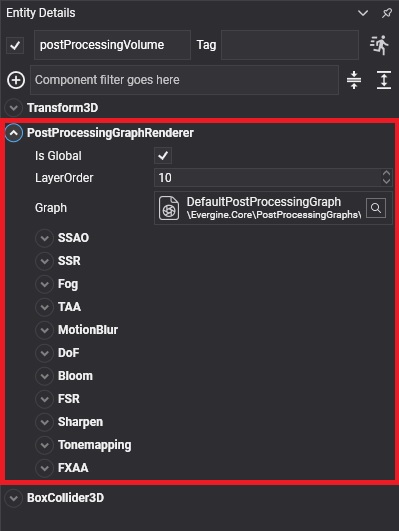
A Postprocessing Volume is an entity in your scene composed of 3 components:
Transform3DPostProcessingGraphRendererBoxCollider3D
With the PostProcessingGraphRenderer component, you can configure it to work in two modes.
| Mode | Description |
|---|---|
| Global | All cameras in your scene will be affected by the postprocessing graph. |
| Volume | The cameras that enter into the volume defined by a BoxCollider will be affected by the postprocessing graph. |
In addition, you can configure the LayerOrder to execute the postprocessing in your scene. For example, you can execute the postprocessing after drawing all entities in your scene but before the UI entities.
Finally, the PostProcessingGraphRenderer allows you to load a Postprocessing Graph asset and displays all its nodes or its associated decorator.
